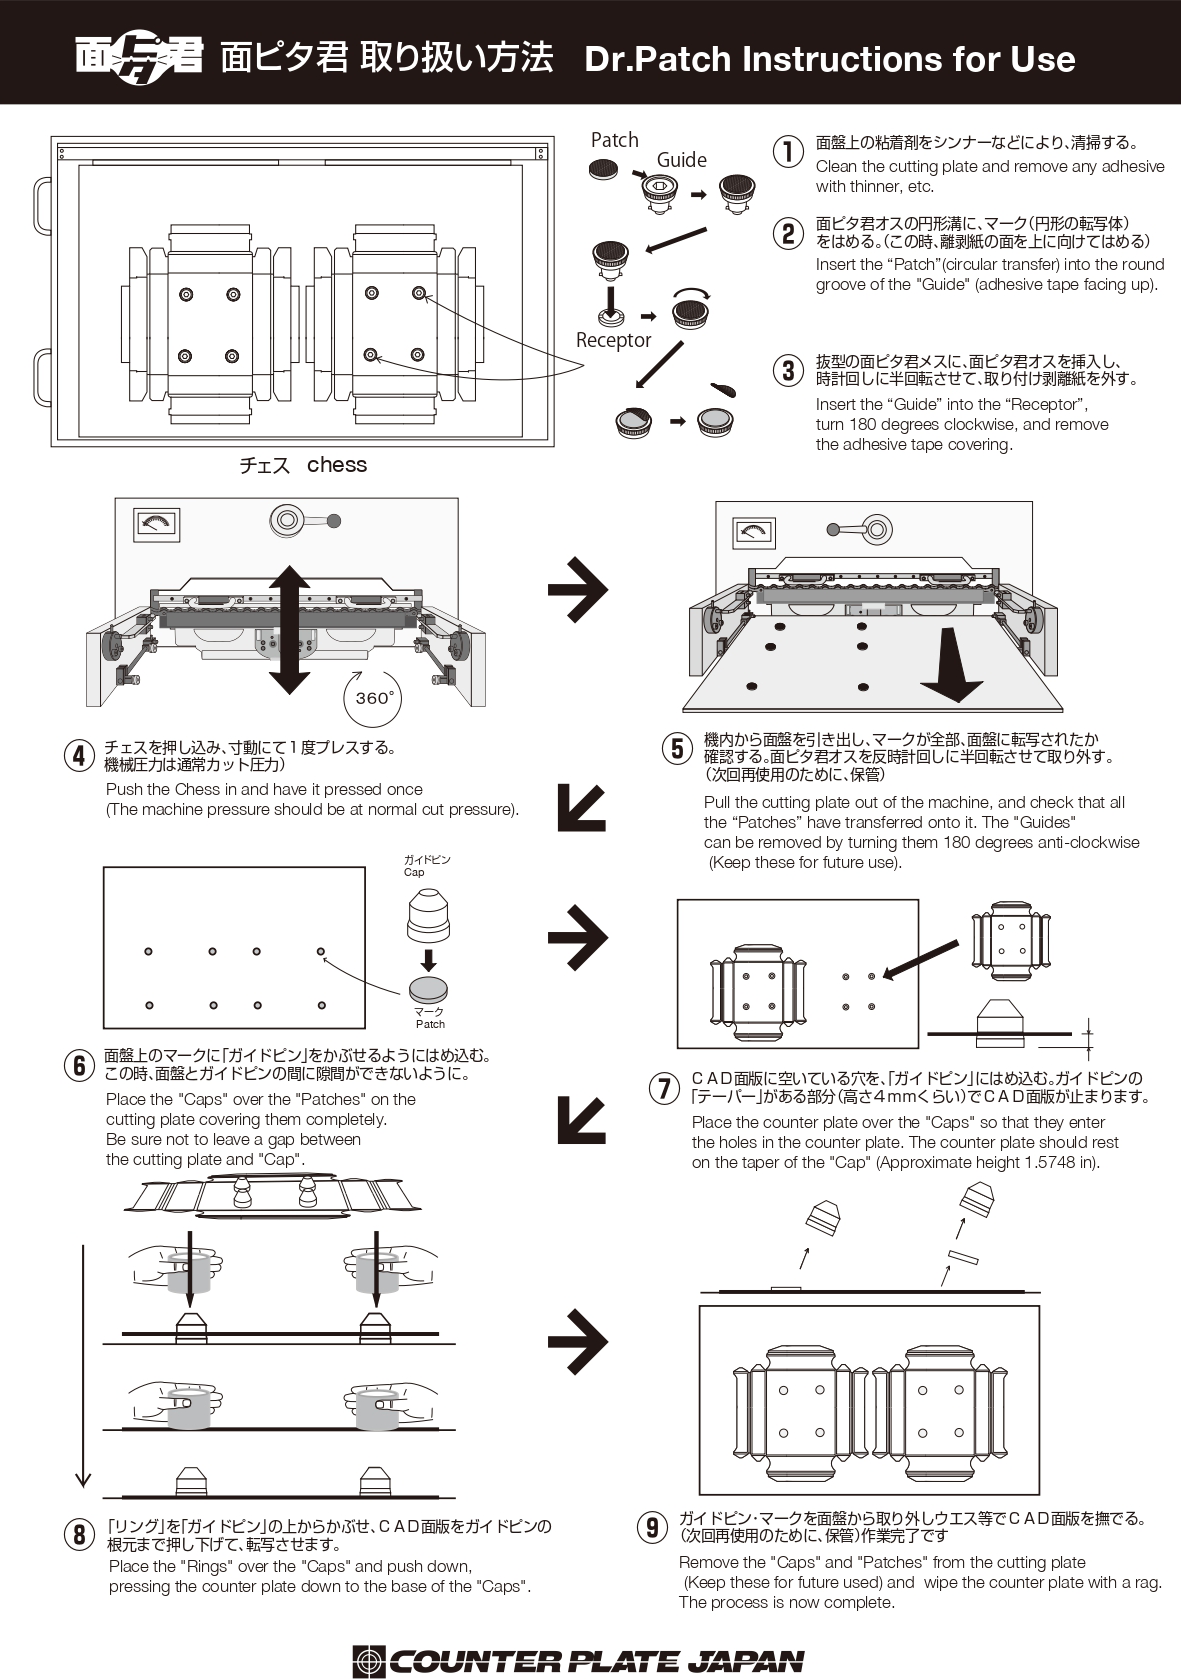
Pin removal during CAD counter plate transfer work can waste a huge amount of time.
We offer two types of transfer pins: Counter Ranger, which completely cuts the time and effort needed after transfers, even eliminating the need to pull out the chase; and ProLess 1, which cuts waste by 70%. In addition to these, we also offer the Dr. Patch system, which allows for easy transfer of resin counter plates for large blanks.
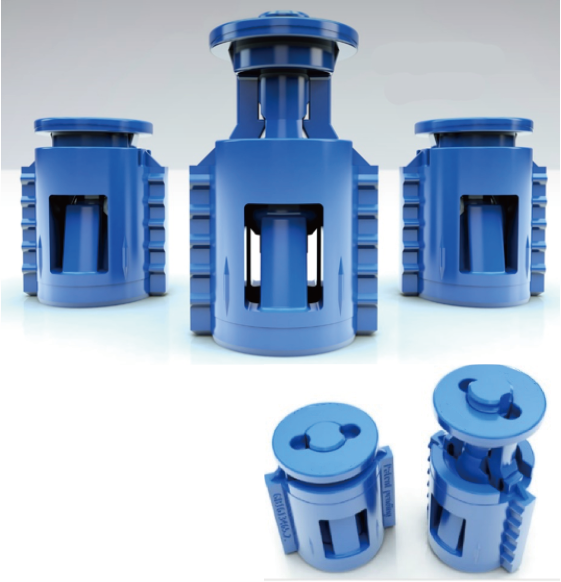
Combining the sleeve, ring, and pin into a single unit means that there are no parts to remove, and you can simply insert them into the die's plywood board. As a result, feeding in a sheet of die-cutting paper after transfer pushes down the pins, eliminating the need to pull out the chase, for a 100% time savings.
This also solves a separate issue that has arisen in recent years, where you cannot move on to the next operation without first counting the number of components to be removed.
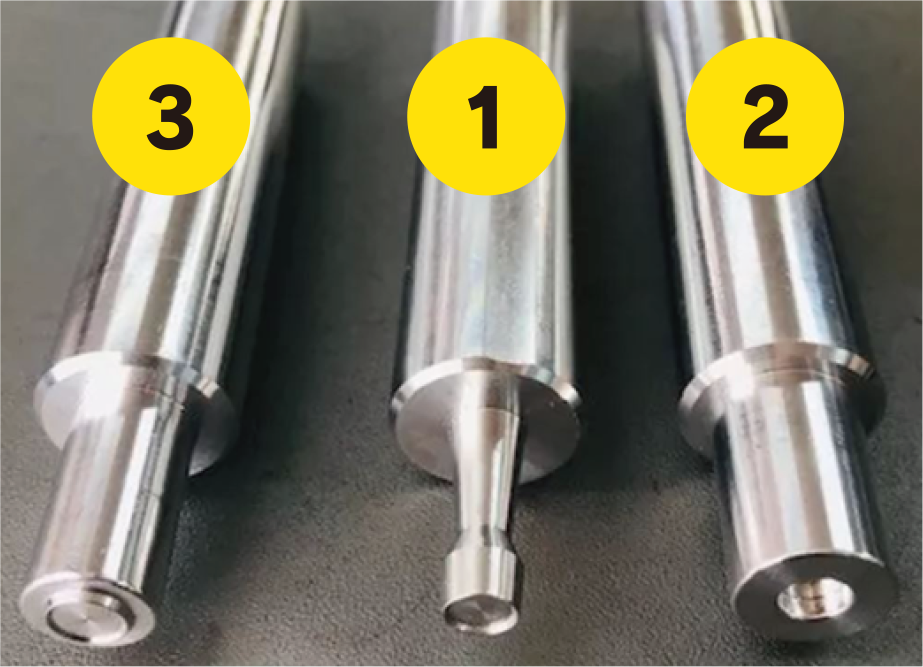
We provide three specialized tools for use with the Counter Ranger.
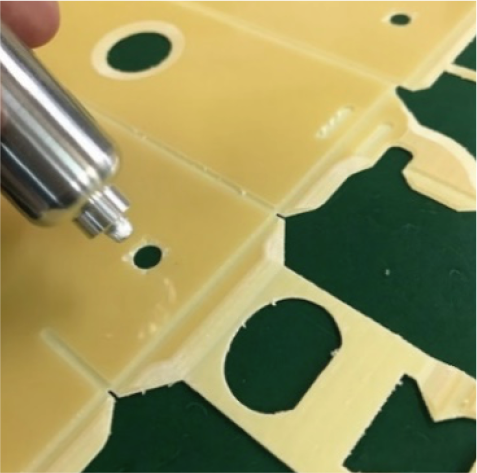
This tool is used to press pins out from the reverse side of the die to cause them to protrude, for the purpose of attaching the counter plate (CAD counter plate).
The pins will audibly snap into place. These pins all have a consistent height, so that the counter plate will rest on top of the 7 mm-thick sponges.
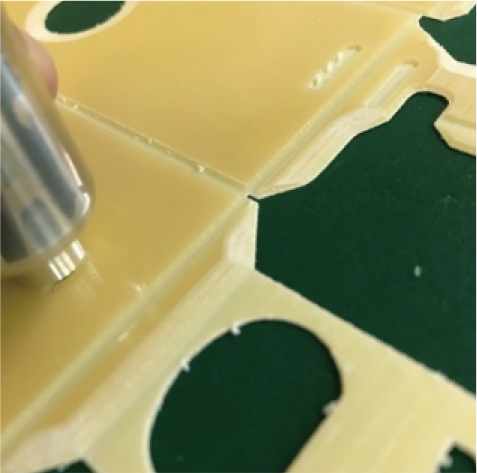
This tool is used to ensure complete insertion of the Counter Ranger into the laser-cut plywood board for the die.
We will email you plywood board cutting data and counter plate (CAD counter plate) data; match these with your actual sample.
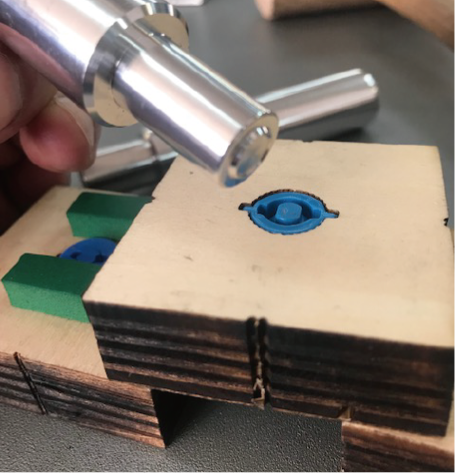
The plywood cutting data is created based on an expectation of 0.7 mm laser-cutting width. The counter plate holes in the data are shown based on an expectation that the tool diameter is 3 mm. Note: Use a wooden or plastic mallet to drive the Counter Ranger into the plywood. To finish, put the special tool (which has a recess in the center of its end surface, as shown in the photo, to allow the pin to rest inside) onto the Counter Ranger, and hammer the tool, in order to insert the Counter Ranger all the way through to the reverse surface of the plywood.
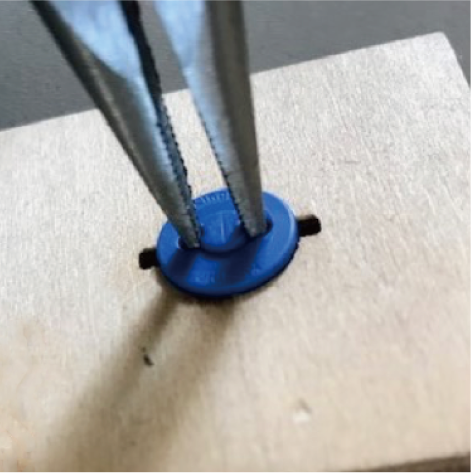
This tool is used to remove the Counter Ranger from a die board that is being disposed of, in order to reuse the Counter Ranger.
(Repeatedly removing and reinserting the Counter Ranger may cause the Counter Ranger to fall out of the plywood board of the die when the pin is pushed out.)
As shown here, you can easily set the tool onto the bottom of the Counter Ranger from the reverse surface, then use a plastic hammer to drive it out from the top face.
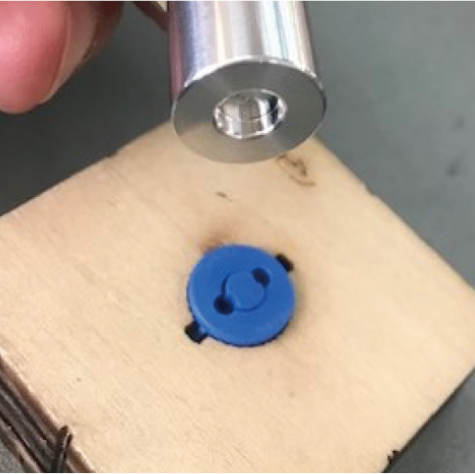
Make sure that the holes in your counter plate (CAD counter plate) are the same size as the holes in the sample we provide.This will allow the Counter Ranger to easily click into place. Holes that are too small will lead to failed transfers.
If a hole in the resin counter plate is too small, you may be unable to remove the counter plate from the pin. We provide an adjustment tool to ensure that the holes are the proper size. Try to develop a feel for inserting the Counter Ranger in these properly-sized holes.
Once you are familiar with this, you will no longer need to perform this step of the work.
The tool has a diameter of 4.8 mm. Even if your machinery produces inconsistent hole diameters, so long as the holes are within a 4.75–4.8 mm range, you can then use the tool on a sponge board to ensure the proper diameter.
Use an awl or similar tool to make the hole slightly larger. Generally, whether counter plates transfer successfully or not depends on the material used, but if you can't remove a counter plate from the pin, you will have no choice but to make the hole bigger.
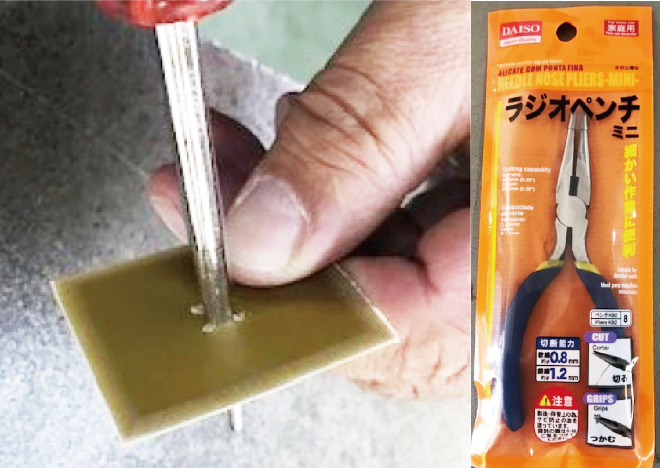
Insert needle-nose pliers into the two holes on top of the Counter Ranger to pull the pin out from the counter plate hole. The pin should pull out easily. (You can use store-bought needle-nose pliers that come to a fine tip.)
We also produce soft sponge rings to allow the pins to be smoothly pulled out from the counter plate holes. These sponge rings have an inner diameter of 15 mm and an outer diameter of 27 mm, and 40°hardness.


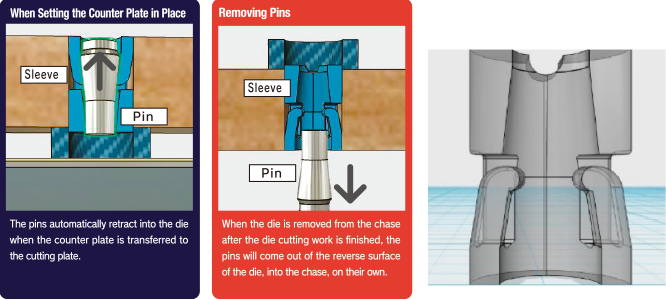
ProLess 1 is used by pressing the pin from the reverse side of the cutting die, using the Counter Ranger pin pushing tool. After setting the counter plate into place and performing a transfer, just pull out the chase and use your finger to press the pin into the plywood board of the die. To remove the pins after die cutting work, pull out the die and simply collect the pins from the underside of the die. Watch the video here to see an example.
Collecting the Pins


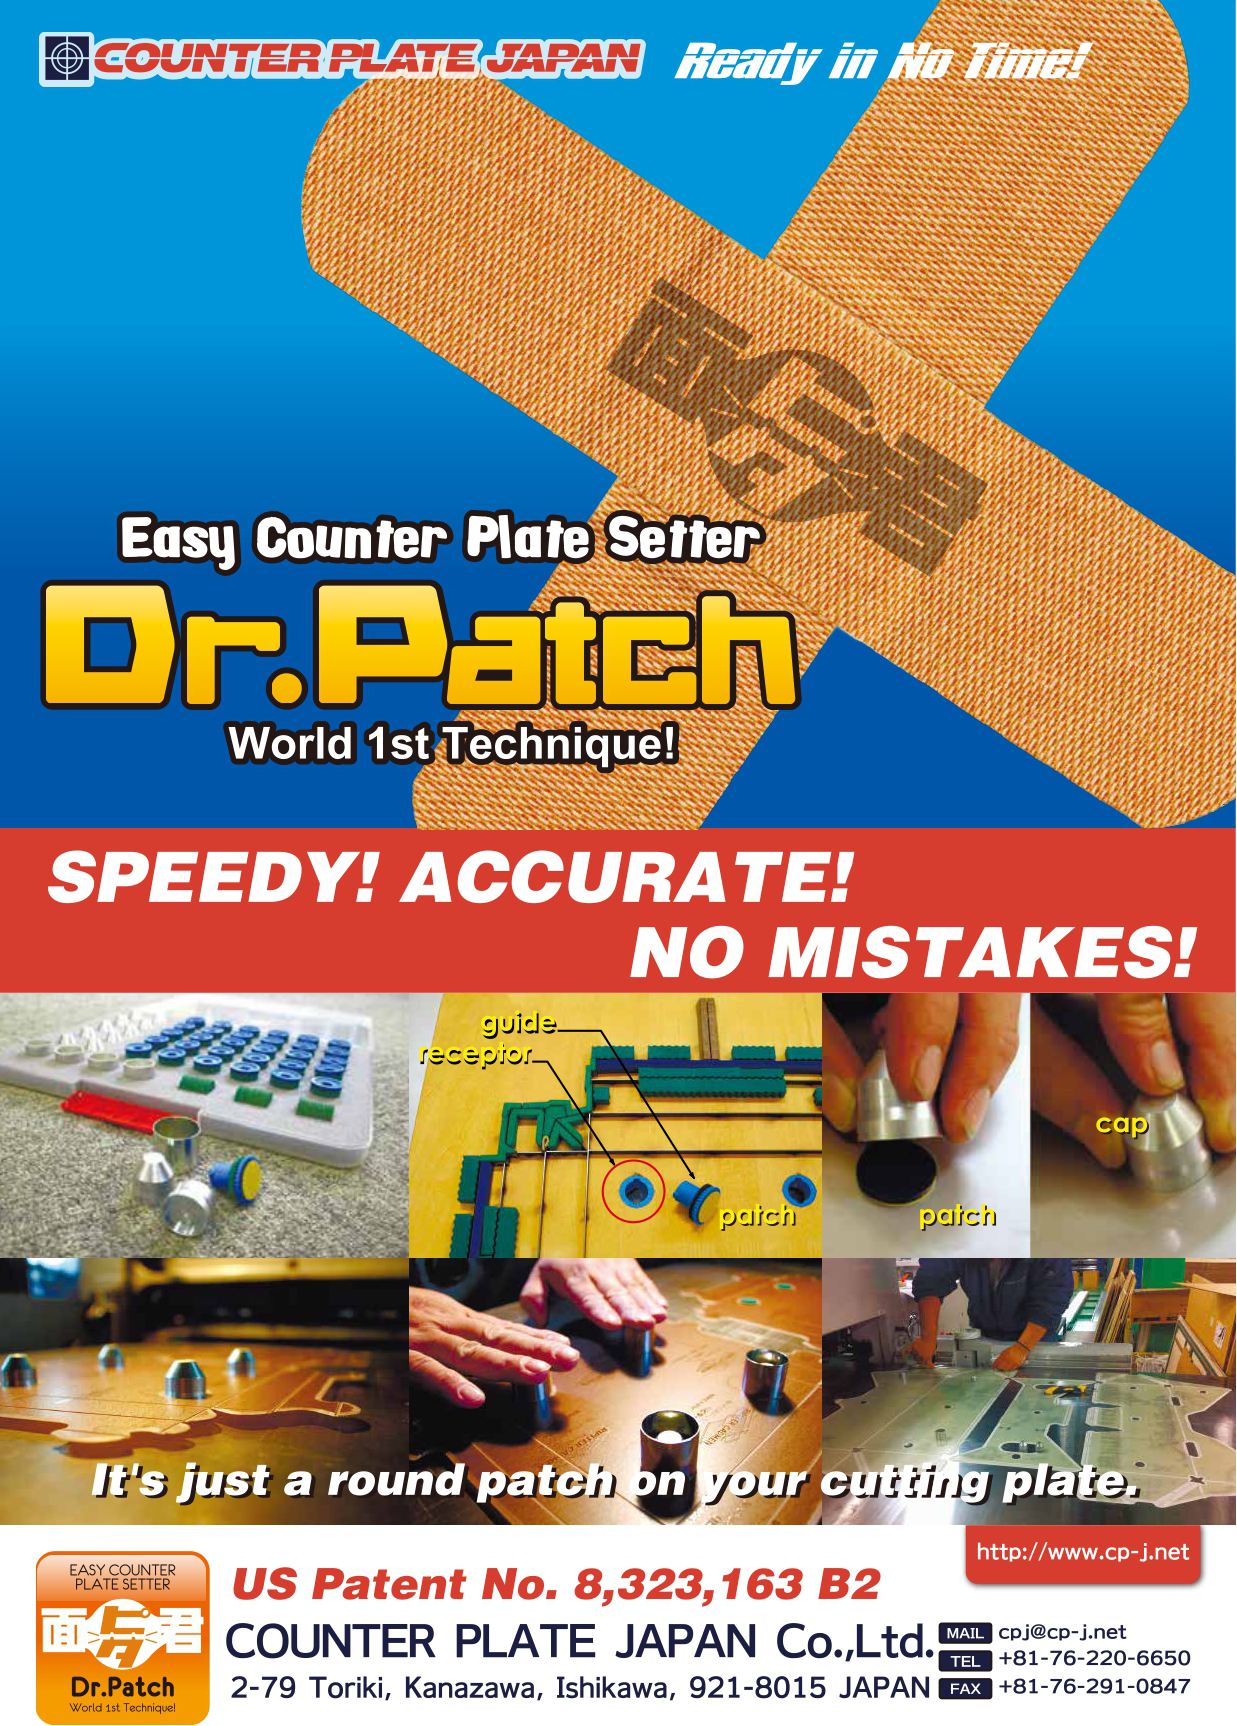
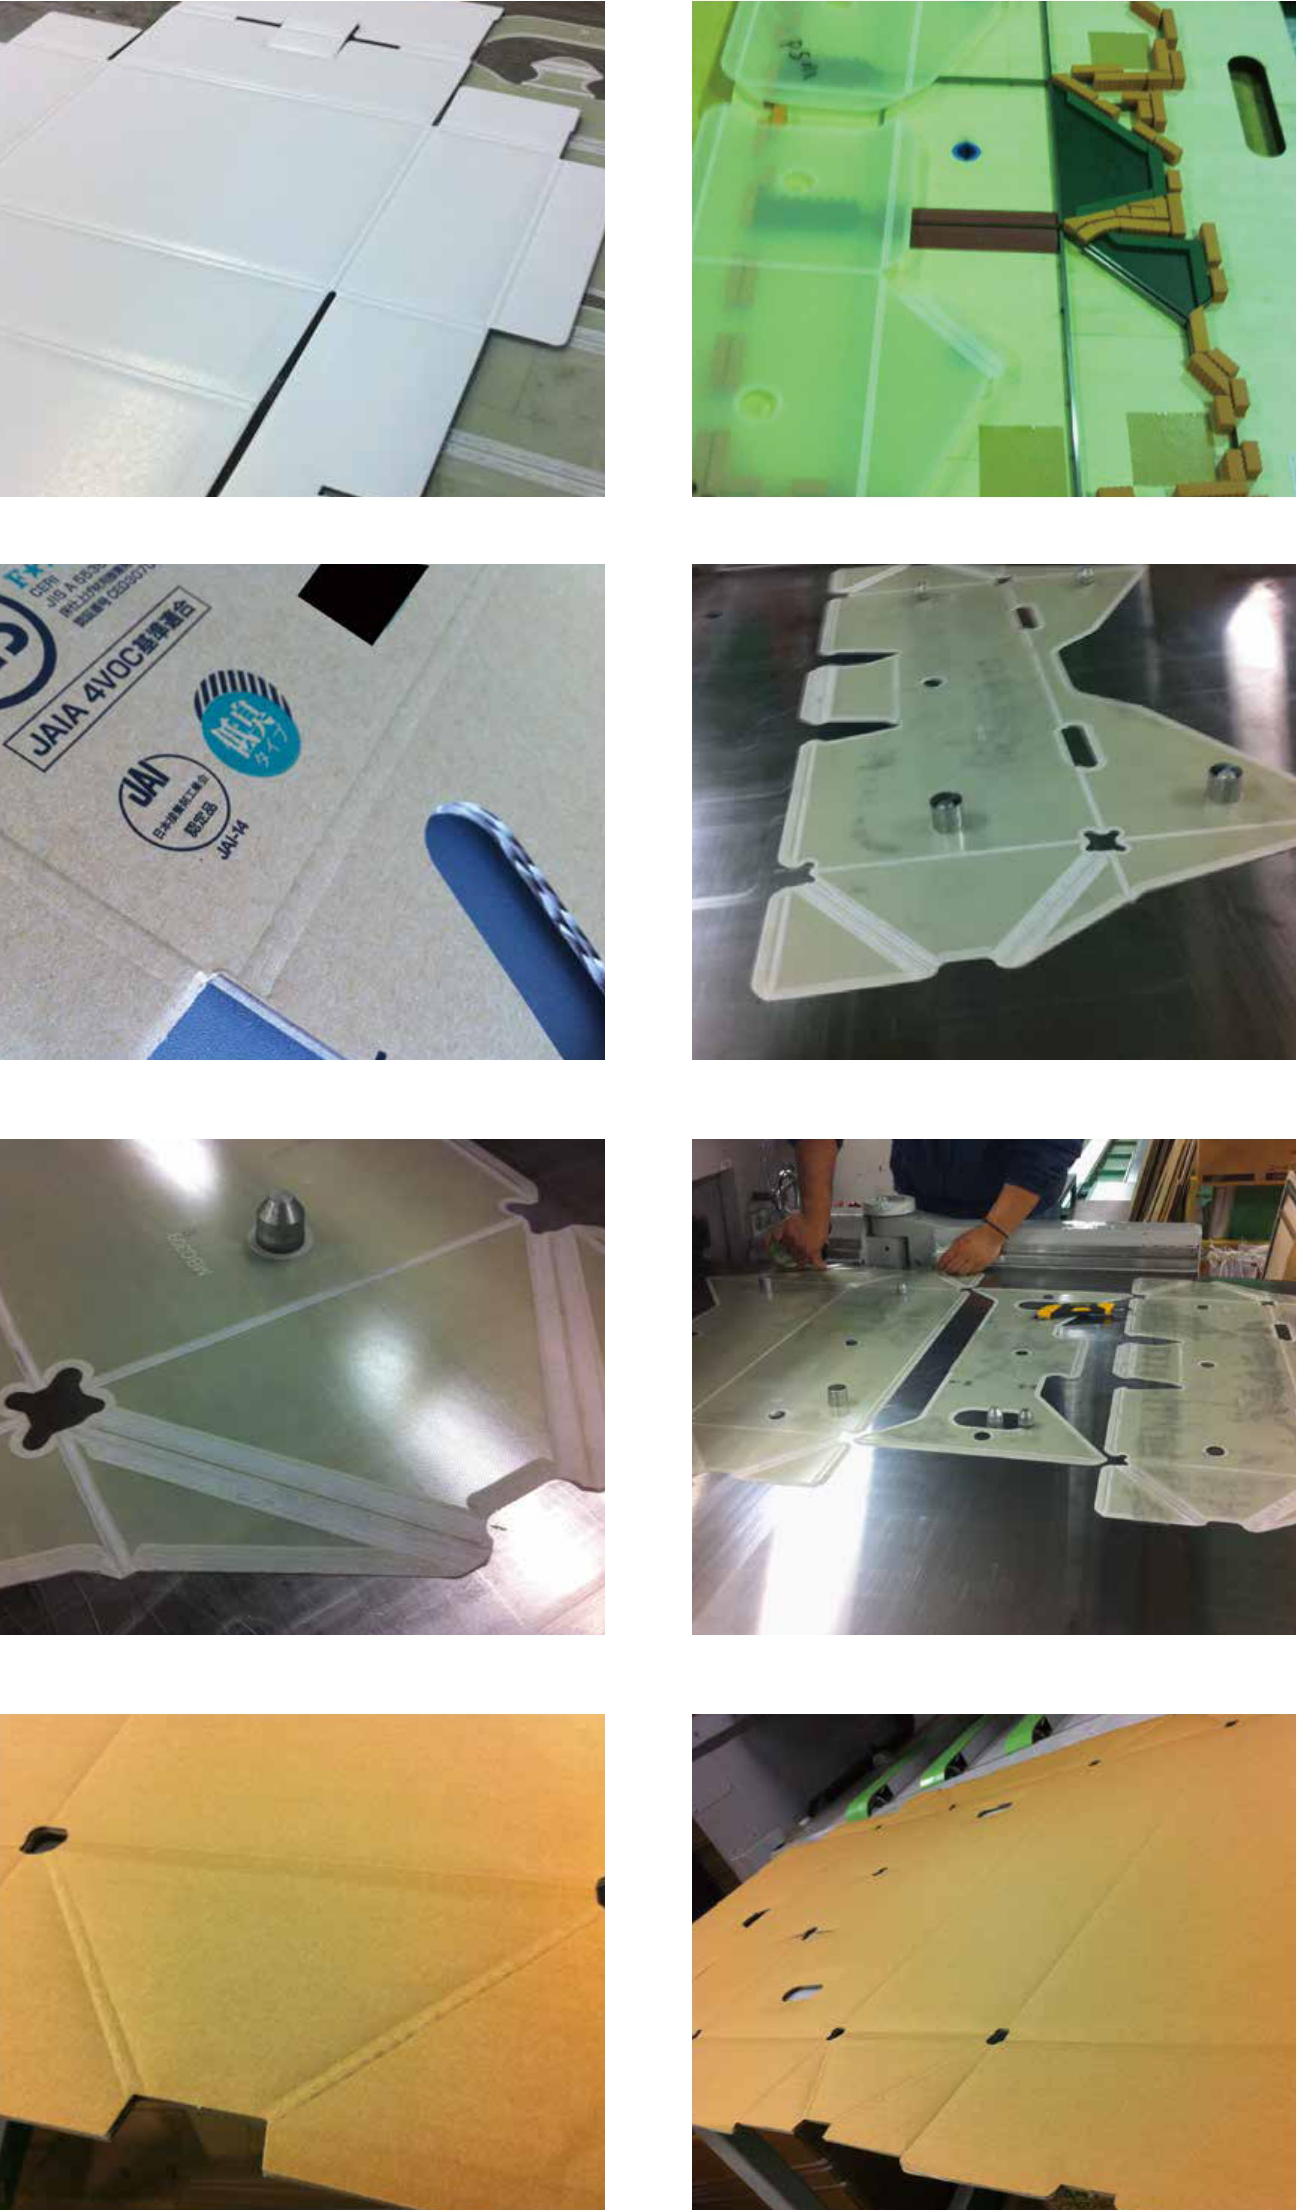
Dr. Patch is exceptionally well suited for transfers of large counter plates. In Japan, it's also used for double-wall cardboard. With Dr. Patch, you also don't have to worry about issues like the counter plate falling down or drooping under its own weight.
Overview